Showing posts with label the textured leaf. Show all posts

Sunday, October 31, 2010

flea market finds

For Flea Market Finds this week I have some nice found objects.
 This smock dress is pure silk and fits me perfectly.
Look for me in this at the next Mulgrave Makers Market.
I do not know at what stage I suddenly turned into a pink lover....in my defense it has a leafy treelike print with birds and had me at hello.

These were in the very same case almost right next to each other at my local-fast-becoming-my-favourite-op-shop and screamed Eleesa. So I had to get these as a thankyou for all her support and encouragement with my recent foray into markets. I wouldnt have made it without her guidance as im a bit of a dufus when it comes to organising myself and getting 'out there'.

These buckles will go onto something I made for my son and a jacket and perhaps a handbag, plus the buttons will be perfect on some of my Little Tree Kids range.

I love having a supply of vintagey, weird and wonderful postcards for handwritten notes and there are too many for me to get through in one sitting at my local secondhand bookstore. Im even tempted to buy the ones that have already been written on. Especially shaky granny handwriting.

For those of you still unaware of how large these babies are, (and what one of you will win tomorrow),
scroll down...


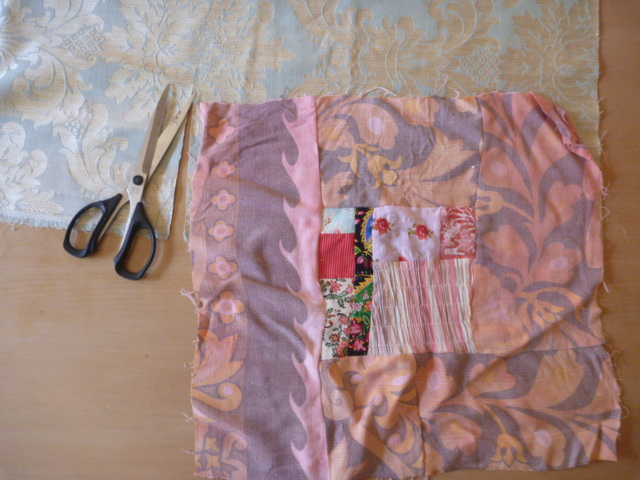
Funny but MrTL just adored this mexican one and had to have it for his quilting. 

This one has also been snapped up by a dear friend who loved it.
Unbeknownst to me shes been struggling pin-cushionless for days/months/years!

It has vintage barkcloth sides and a pure linen base.

Good luck everyone with the draw ill be posting tonight at midnight!

P.S.  I have been asked if I could list these in my etsy store and will place some in there very soon for those who cant make it to the market and would like one. I will post worldwide, obviously.


Sunday, October 17, 2010

an announcement


Id like to announce the small beginnings of my fresh new label Little Tree Kids. Ive finally made a decision to do this kids clothes making for real. Not just as a side line to my life, but, now that I have a wonderful studio space to work in, I feel like ive found my feet. But if you peeked in the window of an evening youd still find me cutting out at the kitchen table.
So... im taking a big deep breath and jumping in. My first market will be this weekend at The Mulgrave Makers Market. (See sidebar for details) Look for me next door to the retro inspired offerings of Eleesa from DorothyBills. Are you allowed to drink champagne at markets? You may see us celebrating getting there! Be sure to say hi, after all thats what markets are all about really, arent they?

Please note;  living with an artist for a husband does not always ensure he will complete artworked banners for you with a deadline/ultimatum given. Ahem, I kind of had to do this for myself after he had done a rough sketch of a tree not meant to serve as the finished work. It set me back a few weeks waiting.

In other news, my shop The Textured Leaf on Etsy will simply house some homewares. Updated with the seasons, as if you didnt guess. If this doesnt motivate me to finish off my quilts more regularly then I dont know what will. I have been hurriedly trying to empty one shop while stocking the other ( I need to figure out how to work Microsoft Office pronto)! Do not try this in the same week of an upcoming market. Enough said.

Perhaps this now explains my recent energy being channeled into trying to finish off my huge list of things around the house? Does anyone want to see the actual list? It gets added to each week of course. Lets call it the domino effect list.

To visit my new kids clothes shop click here, while the old one is still here waiting to be restocked with some homewares in the follow up weeks after the market this weekend.
Stay tuned for what ill be working on this week. Im going into the studio and closing the door as soon as ive given the youngest son his way-too-overdue haircut. I wonder if he'll cook me dinner tonight as payment?

In the meantime why dont you check out these gorgeous pencil wraps Eleesa has been working on. Shes offering one in a giveaway and theres still time to enter.

Hope youve had a nice weekend!

Monday, October 11, 2010

a quilt tutorial: part two


For part two of this tutorial youll need some more random squares like these again. Two or three or four depending on the sizes you have done. Well just start the second row and see what fits, okay? Things should 'click' sometime soon with where this is heading.

P.S. If youve come looking for the first instalment its here.

 step 1.   Place square of patchwork down on base fabric to get the size of the strip you want to cut, just like we did in the very first step. Slice a long strip.

step 2.   Turn over so 'right-sides' are facing and sew together.
Again, just like we did when we made the first strip.

step 3.   Trim off any excess and save if it is a large enough
 'off-cut' to be sewn without the machine 'eating' it.

Mine was too thin this time so I wont be able to use it.

You should have something like this when you place it next to your first strip.

step 4.    Now cut through where you want to put a piece of patchwork in.
Wherever looks right to your eyes.
I cut through roughly where the middle of the base fabric is to the side of my 2nd strip.

step 5.   Take your odd or smaller squares and slice them in half if they are big enough. We are going to make a strip from them.

If you have two then do both.

I had three smallish odd squares and sliced them all in half.

Place them in the cut you just created and work out how many youll need to 'fill' the gap. If your off-cut was large enough sew it to the side of these.

step 6.  Sew them together.
You can add some other fabric to make up the deficit like I have. Then you can save your patchworked squares and they will spread further over the quilt in following strips.

step 7.   Trim off roughly.


This is the end of your 2nd strip.
If these are really different in sizing add more pieces,
repeating steps 4-7, until they are close to the same length. Mine are about 150cm long. I am aiming for a single bed size I suppose. Very roughly though, as these quilts just seem to grow as you go.

Please let me know if I have confused you with my made-up terminology
and ill email you with more specific instructions.

Happy quilting!

Thursday, March 18, 2010

my creative space


I had an order for my etsy shop this week so I thought Id make a couple of extra pieces for a shop update while I was in the mood.
Check out what everyone else is up to over at Kootoyoo.


Related Posts with Thumbnails